

​Tips and Step-by-Step Photos of Basic American-Style Scones
Scones are a much beloved and anticipated feature of British afternoon tea. The rise of the British Empire spread afternoon tea traditions the world over. A scone in New Zealand may be similar to a scone in Scotland or India. In America, we have done our American thing with making scones larger and having more additions and flavors and glazes. British scones are of a modest size, dark golden on the top, and usually round. Inclusions, if any, are currants or raisins. The ratio of flour to fat is lower and eggs may or may not be added. The common British practice of generously topping scones with clotted cream and preserves or lemon curd may explain why plainer scones are preferred.
To confuse us even more, recipes naturally grow and adapt to local tastes and conditions. We may think we are making grandma’s recipe but the ingredients she may have used are no longer available or have been replaced with more modern ingredients. In Britain, two devastating world wars inflicted food shortages that affected what was possible and popular. Scones, as are other tea time treats such as soda bread, shortbread, and crumpets, are made from pantry staples that most cooks would have on hand.
Sometimes, I hear people speak of scones in a dismissive way as dry or hard, and indeed texture is a key factor in a proper scone. As I was taught, the ideal texture of American scones was almost like shale in its layered structure, not cakey or overly dense. Scones are not muffins. If the scones found in coffee shops around the country suffer from a seeming dryness, it’s probably because they are stale. Scones should be freshly baked as close to the time of serving as possible. Many seasoned hostesses, such as Rose, put the scones in the oven as the first guests are arriving, ensuring warm scones as soon as guests are seated.
Having baked for large afternoon tea catering jobs, I learned to make the scone dough, shape and cut into wedges or rounds, then freeze the scones before they are baked. They are transported still frozen then placed on baking sheets to be baked without defrosting. Depending on the size of the scone (I tend to make tea scones fairly small) the baking time increases by only a few minutes. This method enables hostesses to have freshly baked scones ready anytime. Contrary to what you might think, this actually improves the texture of the finished product.
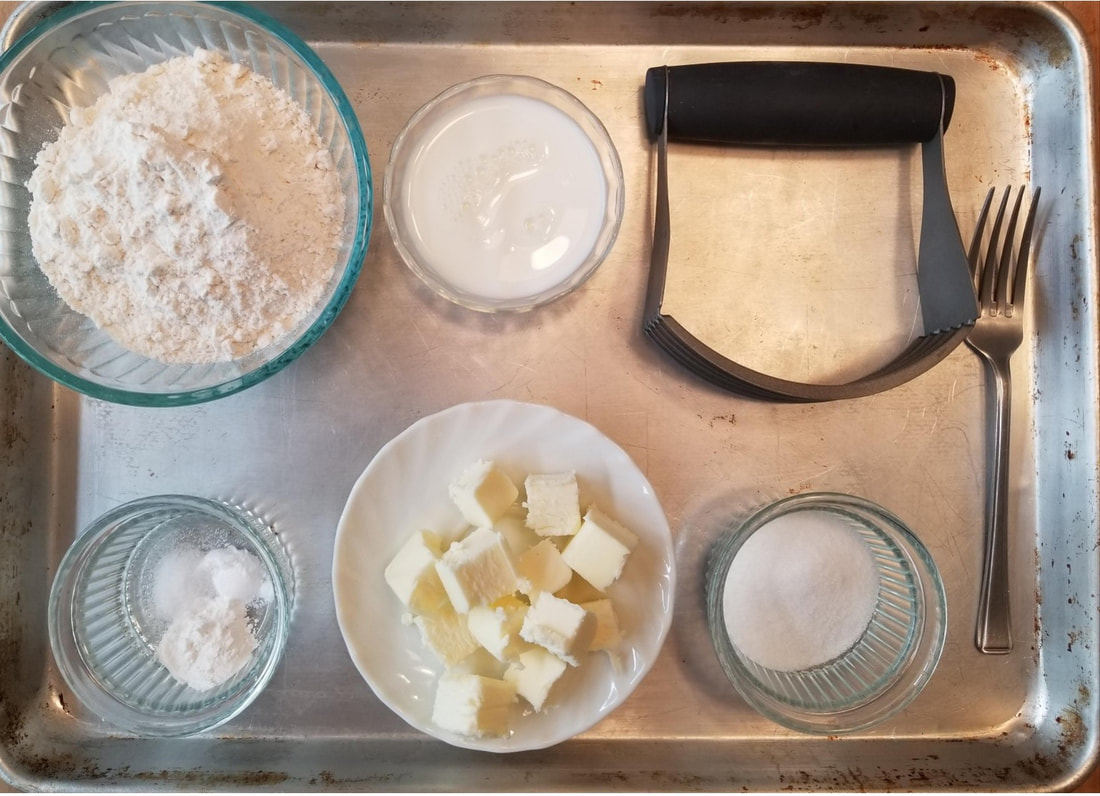
I’ve photographed each step of the scone-making process, from gathering ingredients right through to baking. When teaching baking, I find that if students bake several batches very soon after learning, the retained information becomes part of their baking repertoire. I highly recommend making a date with yourself once or twice a week to practice your scone skills until you feel very comfortable with the process. Scones freeze very well, baked or unbaked, so you never have to worry about having too many scones around.
Equipment: mixing bowl, sieve or sifter, pastry blender or table knife, fork, pastry marble or clean work surface, bench scraper or chef’s knife, pastry brush, baking sheet lined with parchment paper, cooling rack
​

​

​Step 3: Add chilled butter to dry ingredients and cut in with pastry blender.
​

​

shaggy mass, like this:
​


Step 5: Turn dough onto a clean surface. (I’m using a pastry marble which helps to keep dough cold but a wooden board or smooth counter is fine.) Pat into a rough circle. Add a bit more flour if dough is sticking.
​

​

​

nn