

As Rose notes in the “About Lemons” section of our book, Sharing Tea: The Road Back to Civilization, “Lemons are afternoon tea’s best friend.” We know that a scone’s best friend is lemon curd (along with some decadent clotted cream) and that many tea drinkers take their tea with a slice of lemon. Beyond that, we love to serve citrus accented foods to balance the sweet desserts found on the afternoon tea menu.
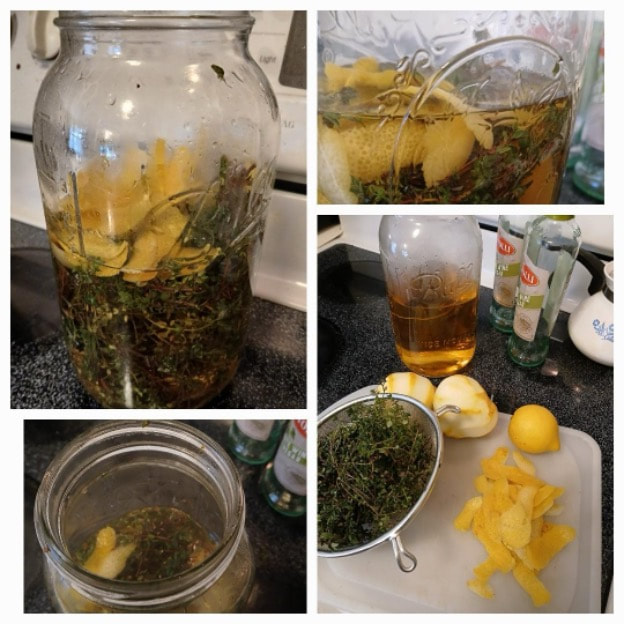
In the temperate climate of coastal California, my father’s lemon tree produces big Eureka lemons almost all year. When Suzi moved up near me, in far Northern California, she planted miniature lemon and lime trees. This year both trees had their first bumper crops, first the lime tree gave a five-gallon bucket of deep green limes, followed a few weeks later with even more lemons. Both of us juiced over a quart of each kind of juice for the freezer, and I made batches of lemon curd for gifts over the holidays. Lemon curd freezes beautifully, so it makes sense to make a lot when you are presented with many lemons.

|
|
|
|
|
|
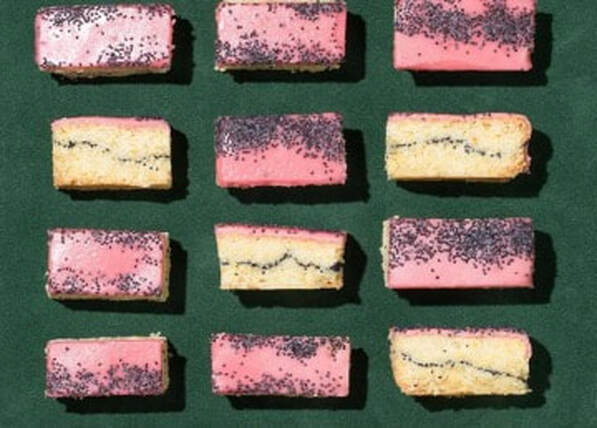
Blood Orange & Polenta Poppy Seed Shortbread Bars
Special equipment: 8×8 inch square pan, lined with parchment paper with overhanging parchment on two sides, sprayed with baking spray or buttered, large mixing bowl, whisk, hand or stand mixer, silicone spatula, cooling rack, small saucepan, small knife or offset spatula, small bowl or glass measuring cup, cutting board, serrated knife,
Preheat 350°F
Makes 1 8×8 pan
- 2/3 cup polenta (cornmeal)
- 1 teaspoon kosher salt or ½ teaspoon table salt
- 1 ½ cups all-purpose flour, plus more for hands
- ½ cup granulated sugar
- Finely grated zest of 2 blood oranges
- Finely grated zest of 1 lemon
- 1 cup (2 sticks) unsalted butter, room temperature
- 2 teaspoons vanilla extract
- 2 tablespoons poppy seeds, plus more for sprinkling
- ½ cup blood orange juice
- 1 cup powdered sugar
- Preheat oven to 350°F. Whisk flour, polenta, salt, in a medium bowl to combine. Set aside.
- Place granulated sugar and blood orange and lemon zests in a mixer bowl and rub together with your fingers until mixture is very fragrant and sugar starts to look a little moist, about 1 minute. Add butter and beat with an electric mixer on medium speed until light and fluffy, about 3 minutes. Add vanilla and beat just to combine. Reduce speed to low and gradually add dry ingredients, mixing just until combined. Fold dough with a spatula a few times to incorporate any dry bits in the bottom of the bowl. The dough will be wet and a bit sticky.
- Using floured hands, gently press half of the dough into prepared pan in an even layer. Sprinkle 2 Tbsp. poppy seeds over dough; press gently to adhere. Scatter pieces of remaining dough over and press down into an even layer with floured hands.
- Bake shortbread until edges are golden brown and center is light golden, 25–30 minutes. Place on cooling rack, let cool in pan.
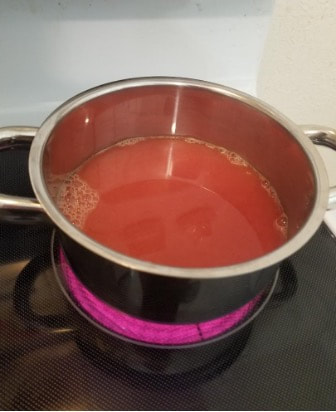
- Meanwhile, simmer blood orange juice in a small saucepan over medium heat, swirling often, until reduced to 2 tablespoons, 10–12 minutes. Pour into a small bowl and let cool.
- Carefully slide a small knife or offset spatula along sides of pan not lined with parchment paper, then use edges of paper to lift out shortbread onto a cutting board. Using a serrated knife, slice into quarters in one direction, then into eighths in the other direction (for larger bars, just cut in half first). Puzzle shortbread bars back into pan the same way they came out; set aside.
- Add powdered sugar to bowl with reduced juice and whisk until smooth. The glaze should fall off the end of the whisk in a thick, glossy, smooth ribbon. If glaze is not pourable and gets stuck in the whisk, add water a ½-teaspoonful at a time until you get the right consistency. Drizzle glaze over shortbread in pan and use an offset spatula to smooth all the way to the edges. Sprinkle with more poppy seeds and let shortbread sit until glaze is set, at least 1 hour.
- Just before serving, retrace cuts with a sharp knife and remove bars from pan.
Do Ahead: Shortbread can be baked 3 days ahead. Once glaze is set, cover tightly and store at room temperature.
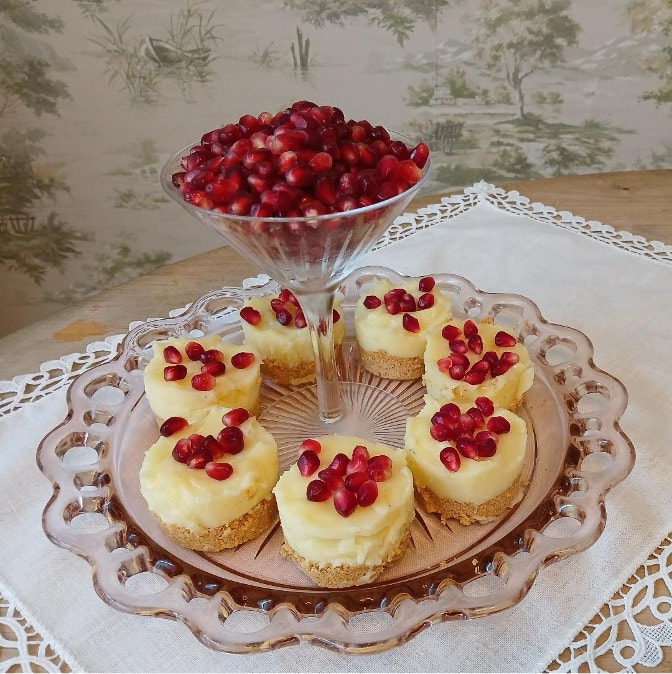
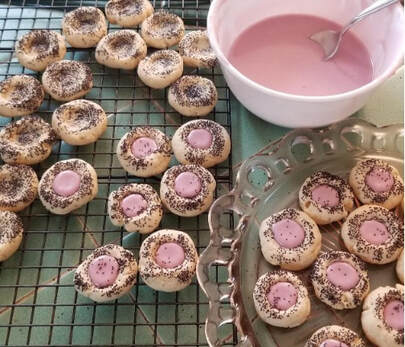
As I reported above, Suzi’s miniature lime and lemon trees both had bumper crops this year, letting us both run wild with lemon and lime everything. This is the first lime recipe I tested, and it is a winner. Nicely tart with the fresh lime juice, it would also be good with lemon or the slightly sweeter Meyer lemon juice. It was originally a recipe for key lime pie filling, which I love, but here I had no key limes and I wanted smaller, individual tarts. I used a 2” round, removable bottom miniature cheesecake pan but the tarts would be good in muffin tin size or 4” tart size and yes, probably even a pie.
Special equipment: tart pans or miniature cheesecake pan with removable bottoms, medium mixing bowl, cooling rack, heavy-bottom medium saucepan, whisk, hand or stand mixer, ice bath to fit the saucepan, silicone spatula, small, sharp knife
Makes about 3 cups filling, makes about 20 2” tarts
Preheat oven 350 degrees F
Press-in crust:
- 1 ½ cups graham cracker crumbs
- 1/3 cup sugar
- 6 tablespoons butter, melted
Lime filling:
- 1 1/3 cup sugar
- 6 tablespoons corn starch
- ¼ teaspoon salt
- 2 cups half and half
- 4 egg yolks
- 2/3 cup fresh lime juice
- 3 tablespoons butter, cut into chunks
Garnish:
- a handful of pomegranate seeds
- Prepare crust: gather tart pan(s) you will use, set aside. In medium mixing bowl, stir together graham cracker crumbs and 1/3 cup sugar. Stir in melted butter.
- Divide crumb mixture among tart pans. If using 2” cheesecake pan, a rounded tablespoon is about right. Press into pan.
- Bake for 10 minutes. Cool on rack until completely cool. This can be done up to two days ahead. Store at cool room temperature, loosely covered.
- Make the filling: in saucepan, whisk together 1 1/3 cups sugar, corn starch, and salt. Set aside.
- In mixer bowl, whisk yolks, half and half, and lime juice until thoroughly combined. Pour mixture into dry ingredients in saucepan. Whisk to combine and cook over medium heat, whisking constantly until it reaches a boil. Cook mixture for 1 minute, until mixture thickens and coats the back of a spoon.
- Remove from heat and whisk in butter.
- Place saucepan in ice bath, stirring occasionally for about 20 minutes, replacing ice as needed.
- Divide filling among prepared tart pans. Chill for 4 hours or up to overnight.
- To serve: run small, sharp knife around edges of tarts. Carefully remove tarts from pans. Garnish with pomegranate seeds. Store leftovers tightly wrapped, in refrigerator up to 2 days.

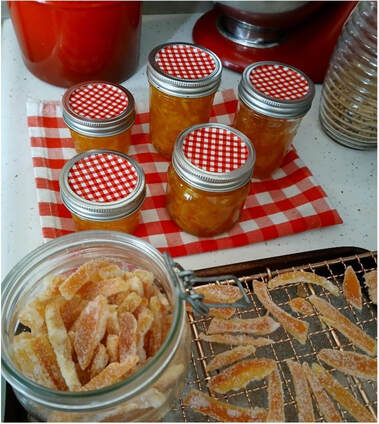
To make easy candies orange slices, stir to dissolve equal parts water and sugar* in frying pan or other wide, shallow pan, over medium low heat. Adjust heat to a low simmer and add orange slices. Simmer for about 45 minutes until slices have softened. Place a rack over a sheet pan to catch drips and dry slices on rack for 24 to 48 hours, at room temperature or in turned off oven until visibly drier and less sticky. Dredge slices in granulated sugar, if desired or store tightly sealed at room temperature. Dip in melted chocolate, if you are feeling fancy.
*This is a simple syrup, for example, depending on the size of your frying pan, you could use 2 cups of water and 2 cups of sugar.
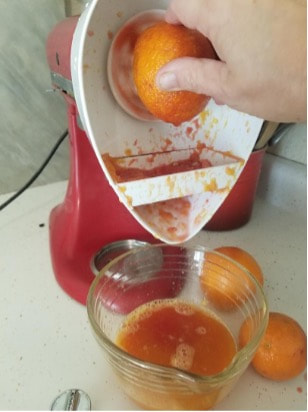
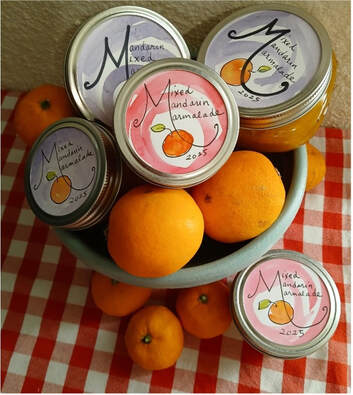
Oh wait, I almost forgot about marmalade. I ran into Happy Valley grown oranges in my local market so bought a whole bag. Back at the house, my neighbor asked me if I wanted any Happy Valley mandarins, as she and her family had just come back from the orchard with more than a five-gallon bucketful! I made a batch of marmalade, made from 100% Happy Valley produce, a happy first for me. I also made some candies orange peel to have on hand for baking.
In Watsonville, a tiny little mandarin tree in dad’s front yard, which looked half dead most of the year, had come from way behind and made it to January covered in perfect little orange mandarins.
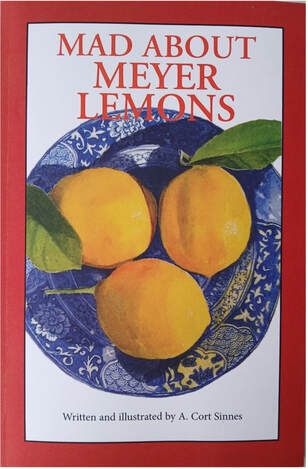
Mad About Meyer Lemons by A. Cort Sinnes is a gorgeous little book illustrated by the author himself. He offers 36 Meyer lemon recipes paired with 36 paintings of his favorite lemons against pieces of his family’s Chinese and Japanese porcelain. In the forward to his book, Sinnes says, “I think it’s safe to say that most artists are obsessed to one degree or another” and goes on to cite artists Hokusai and Riviere who each presented a series of 36 views, Mt. Fuji (Hokusai) and The Eiffel Tower (Riviere.) The paintings, recipes, and recipe head notes all make for a very entertaining read, and the 36 painting are available as prints, should anyone want to own them.
The marmalade recipe is straight forward, calling for 4 Meyer lemons and 4 cups each water and sugar. I won’t go further with the recipe, as the copyright sternly admonishes me that “no part of this book may be reproduced…except by a reviewer, who may quote brief passages in a review.” But never fear, one can get their own copy, available online at Thrift Books, a favorite Amazon alternative.
Happy Spring and Happy St. Patrick’s Day!